Pinch Valve Teardown
What to do when your valve won’t open. Sometimes after a severe clog abrasive will find its way into the inner workings of the pinch valve. To fix this requires the disassembly and cleaning of the pinch valve.
PLEASE NOTE: If your pinch valve does not look like the one pictured, please contact customer support via our ticket system in order to receive the upgrade kit and perform a pinch valve upgrade.
Required Tools
2.5 mm hex wrench
2.0 mm hex wrench
#2 Philips
Rags
PPE
Disconnect Vibration motor leads and abrasive hose.
2. The Abrasive Hopper needs to be removed from WAZER.
3. Remove the Abrasive slip cover.
4. The abrasive tank will need to be emptied of abrasive. Dump all abrasive out of Abrasive Hopper.
5. Remove Abrasive Orifice from inside the abrasive hopper, by simply pulling up on it and then set it aside.
6. Remove the 4x M3 screw securing the pinch valve to its bracket.
7. Depress pinch valve button and pull the tube out.
8. Remove the valve from the hopper. Inspect for any damage.
9. Disconnect the electric plug and verify the contacts are clean.
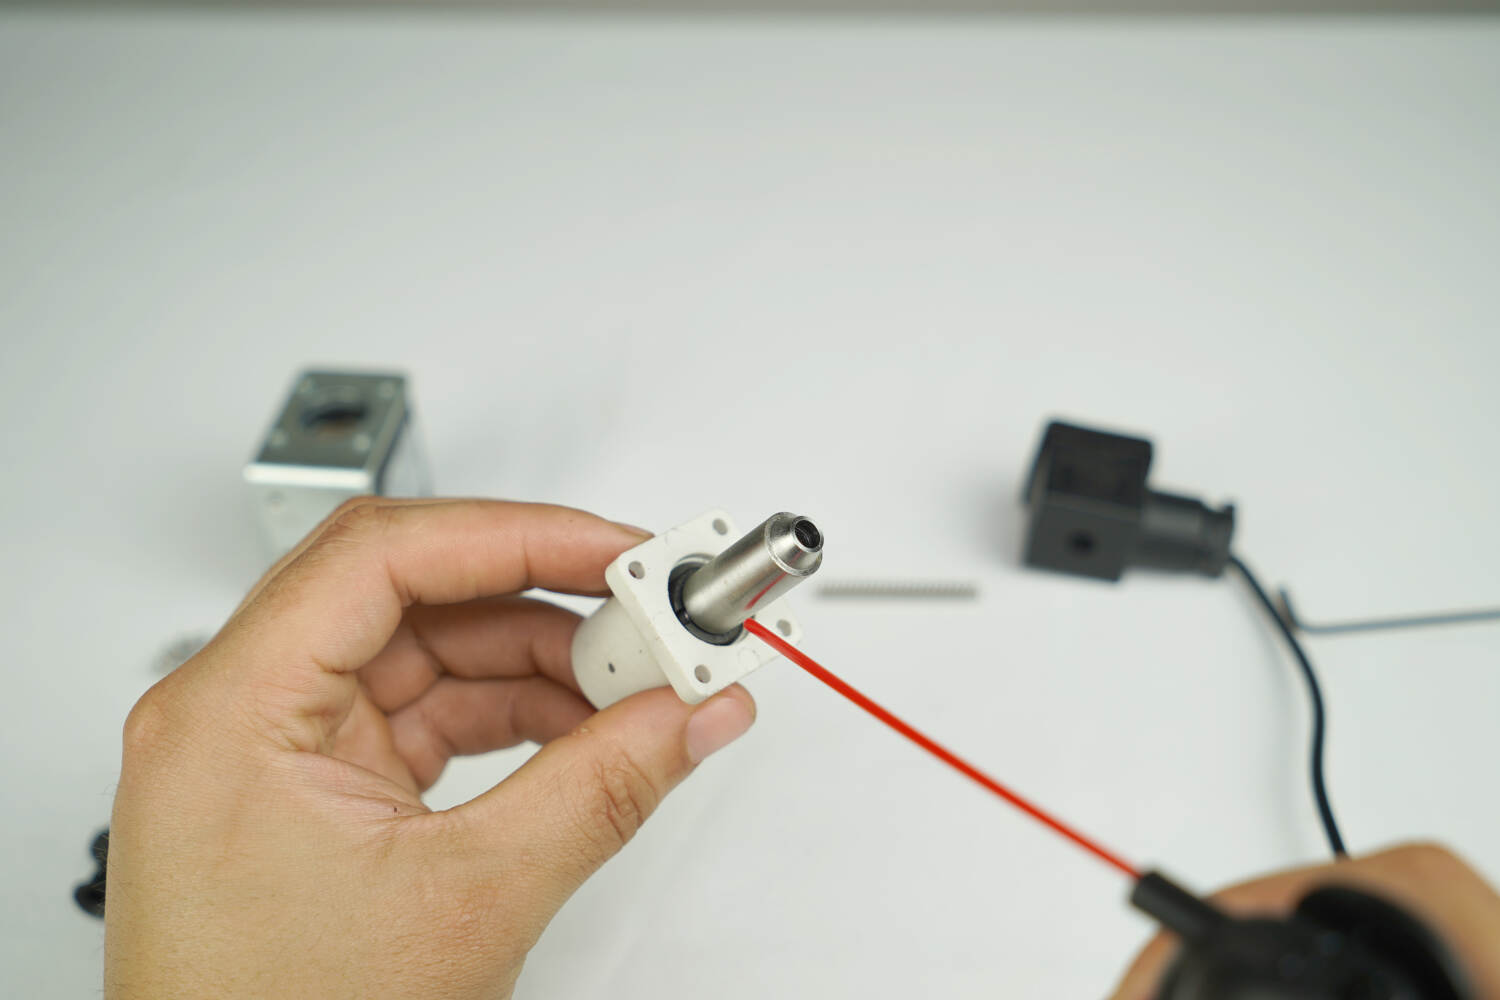
10. Unscrew the four 2.5mm screws from the valve head.
11. Pull off the valve head along with brass bushing.

12. Remove the brass bushing from the valve head shaft.

13. Remove the spring.

14. Press the button and remove the drop tube.

15. Use compressed air to thoroughly clean the whole valve head and solenoid body.
16. Thoroughly clean the brass bushing.
17. Reinstall the spring.
18. Reinstall the brass bushing onto the shaft and make sure it's fully seated.
19. Make sure none of the parts are missing. Insert the steel rod part of the white body of the pinch valve into the solenoid body. Note orientation, white body slot is aligned to the valve label. Wiggle a bit to center
20. Press the black button and insert the drop tube. Make sure to note the orientation.
21. Replace the 4x M3 bolts with a 2.5mm hex wrench.
22. Reattach the electrical connection.
23. Push drop tube through hopper and seat the pinch valve. Reattach the valve to the hopper bracket with the M3 2mm screws.
24. Pull tube through until the end sits flush on the other end of the white pinch valve head. Look through the tube to confirm there are no bends. We recommend shining a light through one end and looking from the other.
25. Install Abrasive Orifice.
Push up slightly on the abrasive valve assembly to make installation easier.
When the metal orifice is in the tube, push it down until fully seated in bottom of the tank.
Make sure the lip of the drop tube is sandwiched between the hopper bottom and abrasive orifice.
26. Re-install Abrasive Slip Cover, reconnect the vibration motor leads, and Abrasive Hose.
27. Re- install Abrasive Hopper into WAZER.