Updating the Firmware & Config File
WAZER was designed to allow for easy updating. Firmware updates will include new features, bug fixes, and stability enhancements. The Config file allow us to optimize the parameters of the WAZER.
To make these updates, you will replace a file on WAZER’s on-board Micro SD Card. You will attain the new files through WAZER’s Downloads Page (which will always contain the most recent and up-to-date firmware and Config File) or directly from WAZER customer service.
To update your Firmware:
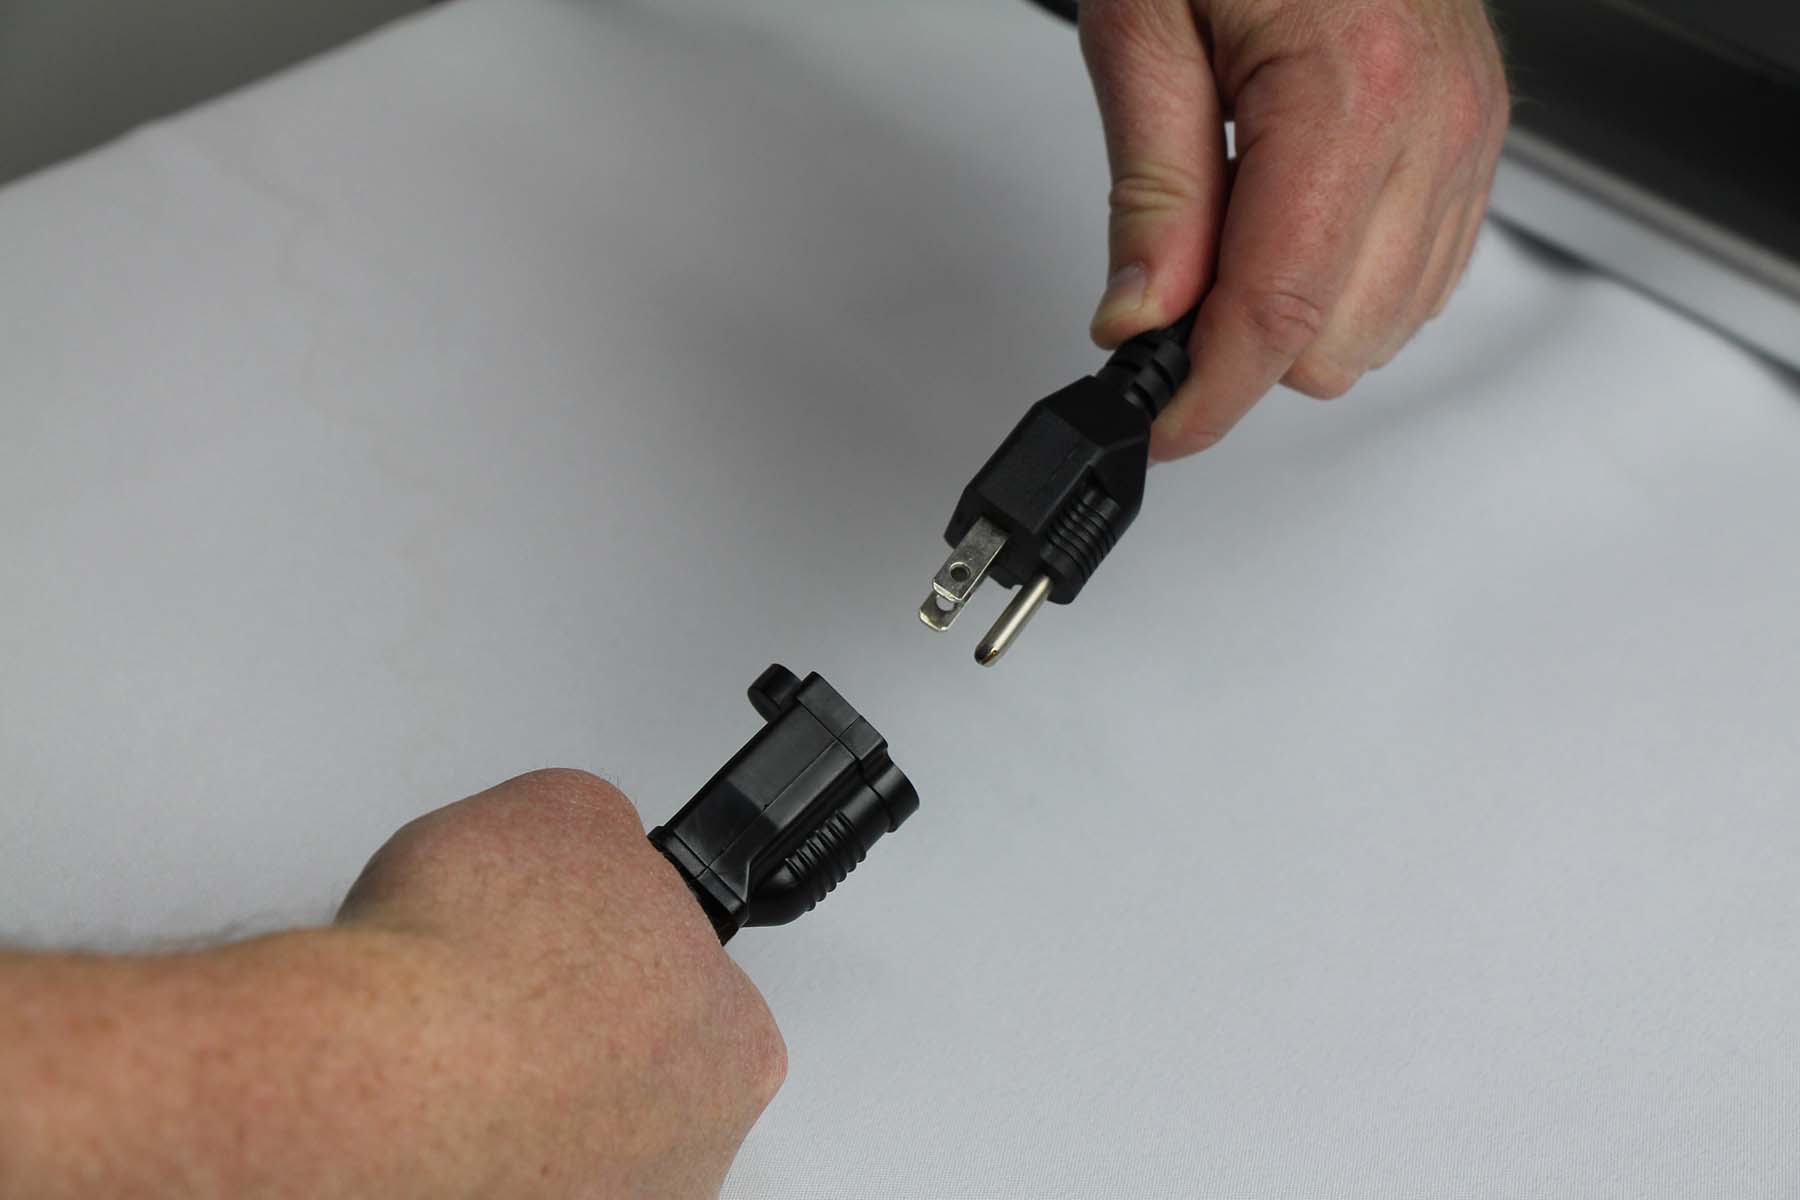
1. Turn your WAZER off and unplug it from the wall.
2. Remove the Right-Side Access Panel of WAZER.
3. Look at the underside of the WAZER Control Box for a Micro SD Card Slot.
4. The Micro SD Card Slot is a push/push style. To release this card, push the edge of the card in and it will extract from the board partially. Now you can remove the SD Card from its slot.
5. Plug this Micro SD Card into any computer and view the files. If your laptop or computer does not have a microSD card slot, please use a adapter.
6. Save the Firmware and Config Files that are on the Micro SD Card in a folder for reference later.
[NOTICE] please disable the “open upon downloaded“ feature in your web browser, and do not open the firmware (.bin) file after downloading. Opening the firmware file will change its file type, and render the firmware not usable in WAZER any more
7. Format the Micro SD Card with the following settings:
a) File System: FAT32 (MAC Users select MS-DOS(FAT))
b) Allocation Unit Size: 32kilobytes
c) Volume Name: Doesn’t matter, but we suggest you label it with the date of the Firmware build.
[NOTICE] The default filetype for non-Windows systems may not be FAT32. Please Double-check the SD card to have the proper format or WAZER will not recognize it.
8. Place the desired new firmware.bin and new config.txt on the Micro SD Card. (Downloads Page)
a) Make sure that the files are exactly labeled as is with no additional characters. No other names will work.
b) If you have previously modified settings in your Config File, you will need to adjust those settings in the new Config File. DO NOT reuse your old Config File with a different Firmware as it may be incompatible. Also the previous firmware will have a .cur file type instead of .bin, this is expected. Upon first boot, the controller converts the firmware file.
9. Insert the Micro SD Card back into the Control Box. Remember this is a push/push style slot, so insert it, push it in all the way, and make sure it latches in place.
10. Plug WAZER back in and observe the sequence of the status LEDs on the Control Box immediately after being turned on:
a) If the LED lights have loaded from the bottom up, it means the new Firmware has been properly loaded onto your WAZER, and the controller is booting up.


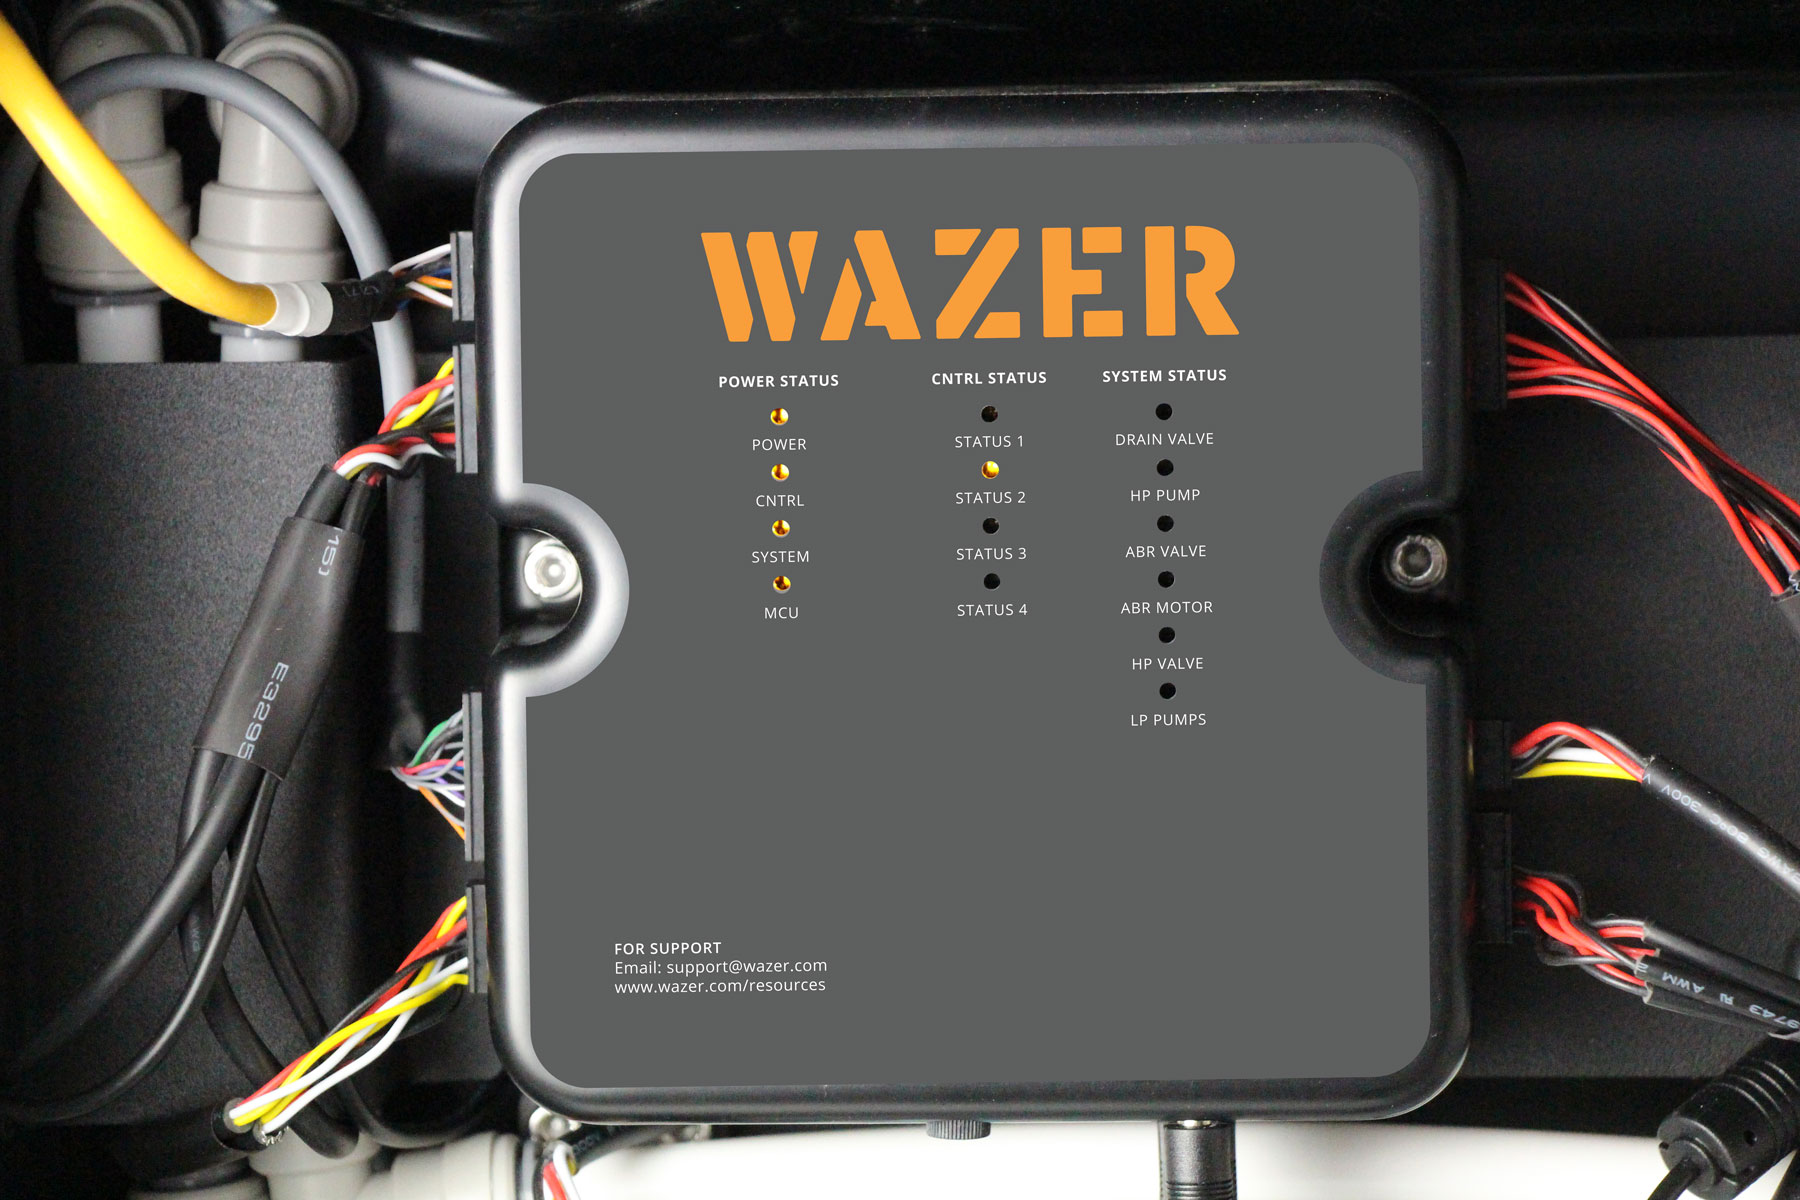

b) If the LED lights have gone straight into a consistent status where only first column LED lit up, it means new Firmware has NOT been loaded,
c) If you see the middle two LED on the middle column flashes, while the other two LED solidly lit, that means the new firmware is successfully loaded.
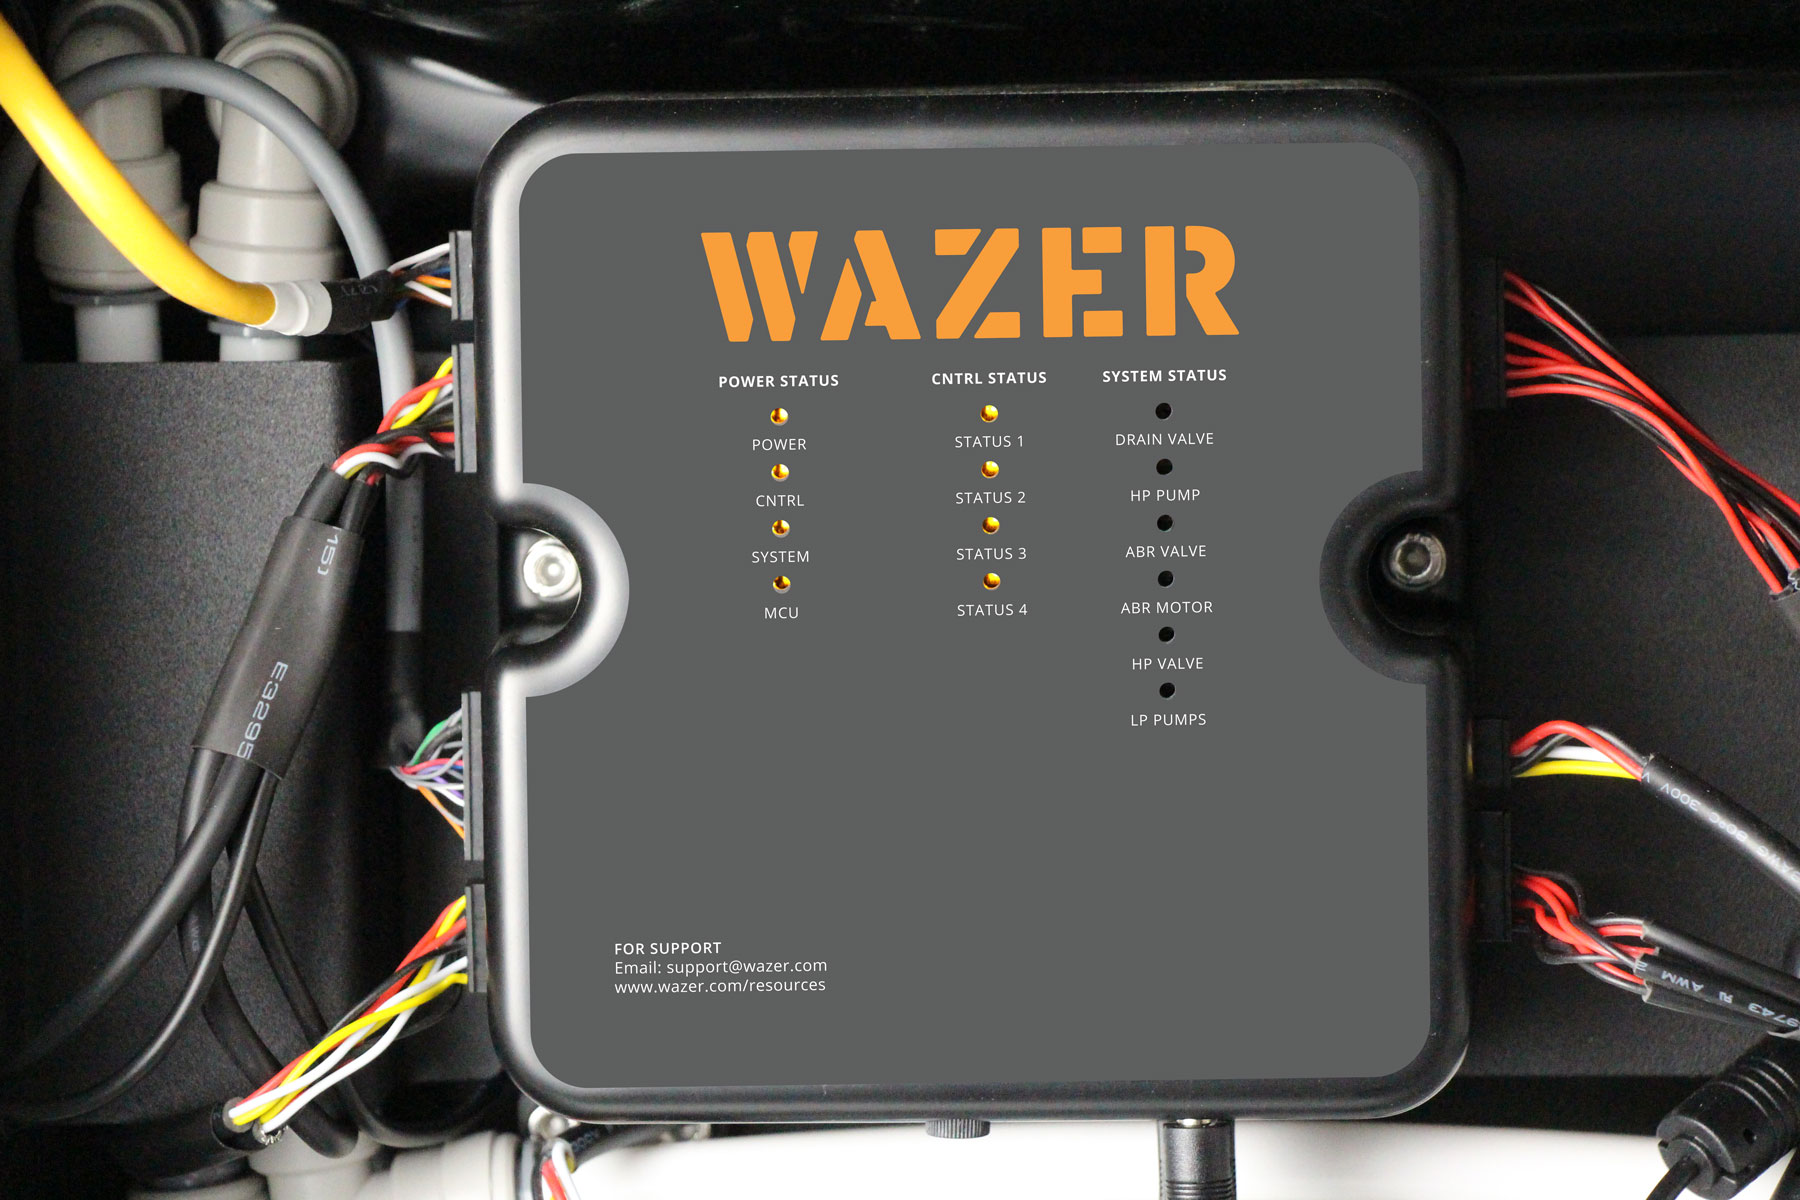


c) One the second time, the boot up sequence would be much shorter. You can see the LED light sequence goes directly to step c). However, if the LEDs goes straight to step c) in the first switch on, it means WAZER is still running on the previous Firmware. Double check the names you used for the new Firmware and Config Files.
11. Replace the Right-Side Access Panel.
12. You can confirm what firmware version you are running by navigating on your machine to: Setup & Maintenance > Maintenance > Firmware Version .