Nozzle Replacement
The nozzle assembly is wear component and needs to be replaced after around 300 hours of cutting. The following guide details the replacement procedure.
Tools Needed
4 mm Allen Key
17 mm Wrench
Torque Wrench with 17 m socket
Adjustable Pliers or 28 mm wrench
Procedure
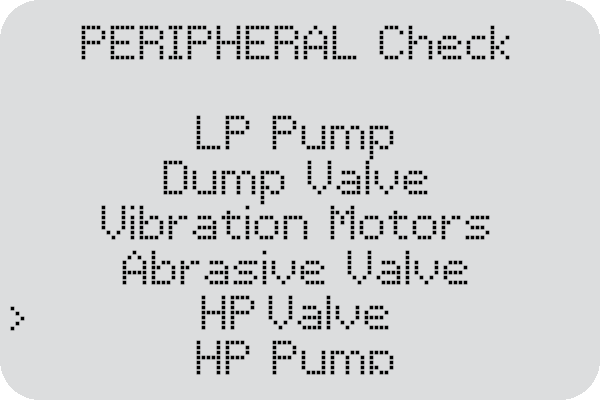
0. Shut off water supply into the pump box, then go to “Setup & Maintenance“ > “Input/Output Check“ > “Output Check“ > “HP Valve“ to purge all residual pressure out from the high pressure system.
1. Remove the two bolts securing the Nozzle to the Z block using a 4 mm Allen key.
2. Remove the Banjo bolt from the Nozzle by holding the mixing chamber with a pair of pliers while loosening the bolt with a 17 mm wrench.
3. Be careful not to lose the 2 sealing washer on either side of the banjo fitting. If they look particularly worn they can be replaced.
4. Remove all tools from cut bed. Leave the banjo assembly unconnected, turn on water supply into the pump box, turn on WAZER, go to “Setup & Maintenance“ > “Input/Output Check“ > “Output Check“ > “HP Valve“. Use the low pressure water to rinse the banjo assembly.
5. Remove the red plug from the end of the new Nozzle.
6. Reinstall the banjo bolt into the new Nozzle. Make sure there is a sealing washer on either side of the banjo fitting.
7. Tighten the bolt to 18 Nm using a 17 mm socket on a torque wrench. Take care to make sure the hose is aligned or pointed to the rear. The wires/cables should point straight to the back, and the abrasive inlet port will be accessible on the left side of the cutting head.
8. Reinstall the nozzle to the Z-block.
9. After securing the cutting head to the gantry block, please prime the High Pressure System. If you attempt to cut without priming the system it can immediately damage the newly replaced orifice.
To prime the High Pressure System, remove the abrasive hose from the nozzle and then run the HP Valve Output Check 3-4 times until you cannot see air in the water stream. See this page for more information.
10. Place the new touch off tool on top. Insert the abrasive line back into the head
11. Finally it is important to pay attention to the Whip orientation. The “Whip” is the bundle of wires and hoses inside the tank. Please check if the Whip always curls up when the nozzle travels to the rear of the tank. Essentially, we want the Whip to stay orientated in an upwards fashion in every direction the nozzle moves. The Whip Caretaking Article can be found here!
Please take note that after the cutting head is worked on, the Whip can become oriented in a way that is prone to damage via the high pressure water stream. If any of the 4 wires/hoses become damaged, it will render the WAZER inoperable until component replacement. In some cases, it can severely damage the gantry system which will require a Main Unit replacement! Please pay attention to the Whip orientation regularly, and after the cutting head is worked on.
If you are concerned about your cutting head or the condition of the Whip, please contact the WAZER Support Team!